Zoodle chicken broth


I could never believed I could make noodle without using flour, but using zucchini instead, I was surprise it is delicious when you pairing with a flavorsome broth, I couldn’t resist to use up my frozen chicken broth that I save it whenever I have some spare time in hand, I made them from scratch. Don’t be shocked with my freezer as I kept roasted chicken bones, a friend of mine keep saying I kept plenty of “animal corpse” in my freezer like those science fiction story. Well, you will be amazed by it, you could rustled some food out from those “corpses”. I don’t always prepare of stock from scratch, nevertheless keeping some reliable stock cube in the larder is useful when you just can’t face cooking from scratch.

This isn’t a recipe, is an idea. Sometime you will just need a bowl of hot soup to going through your stomach. I have a urge to use up cut ingredient that as been in the fridge for few days when I see the fridge have some empty space then I will be happy. I started off by chuck the frozen stock into a pan with low heat to let the stock melt gradually. Meanwhile I spiralized the zucchini into spaghetti form and place them into a dry bowl. When the stock is ready I will tumble in some chopped broccoli and tip in handful of frozen pea. If I feels like making the soup cloudy,  then I will separate an egg, pour the white into soup then turn the heat into low, disturb that liquid by stirring it, let the egg white break into small bits. I will finally drop the egg yolk and let it cook about 1 minute in the abandon water. Finally remove the pan from the heat and place the zoodle into a serving bowl and pour the soup into the bowl, you could sprinkle some chopped spring onion, this look like a Chinese noodle soup.

There many way of prepare this, you could do this. I certainly like it with the broth base, it is such comforting when the warm broth and zoodle met in the bowl. Beside that, during this tough time of pandemic, mindful eating was been talked a lot, I do think of starting a plant-based with mindful cooking, often people talk about mindful eating but not mindful cooking. I think gradually adding plant-based ingredient into my meal will be a surprised that how much plant-based food can be beneficial. Even I switching myself from meat eater to plant-based I though I shift from this zoodle chicken broth.

French classic cod with olives

This French classic is one of those instantly look healthy, and it is incredible easy to prepare. It is very hard to get cod fish in South East Asia, however any white fish can replicate this dish easily.

  • 20g butter
  • 2 rashers of bacon cut into strips
  • ½ red onion, diced
  • 1 clove garlic, finely chopped
  • 250g cod fillet, skinned and cut into chunks (or any white fish will do)
  • 400g tin chopped tomatoes
  • 8 pitted black olives
  • 1 ball of mozzarella, torn into chunks
  • 20g pine nuts
  • parsley, roughly chopped
  1. Melt the butter in a large frying pan over a medium to high heat. Add the bacon and onion and fry for 2 minutes or until the onion is starting to soften and bacon is cooked. Add the garlic and cook for a further 30 second or so.
  2. Drop in the chunks of cod (or any fish of your choice) and fry, turning the chunks every now and then, for 2 minutes. Add the tomatoes an bring to the boil. Reduce the heat to simmer and cook for 2 to 3 minutes.
  3. Add the olives and mozzarella, then take the pan off the heat and let the mozzarella melt in the residual heat.
  4. Serve the cod topped with the pine nuts and the parsley.

This dish could make ahead if you short of time, by that mean you could cook the sauce and fish separately and keep them in the fridge until you needed.

Churros

It was long time ago I made churros for snack. It is time for me to revive the same old recipes that has been used for many years. My absolute classic churros with coated of cinnamon sugar was really my childhood taste for snack. It is very easy to make it at your comfortable zone of your kitchen.

  • 500ml water
  • 1 tsp salt
  • 350g plain flour
  • vegetable or sunflower oil, for deep frying
  • Caster sugar mixed with ground cinnamon, for dusting
  • Piping bag fitted with large star nozzle
  1. Place the water and salt in a pan and bring to boil.
  2. Place the flour in mixing bowl and make a well in the middle Pour the boiling water into the well and whisk to combine with the flour, making sure you get rid of any lumps. The batter should be smooth and fir. Let it stand to cool for an hour.
  3. To cook the churros, heat the oil in a wide-based pan and test whether it is hot enough by dropping a piece of bread in. It should sizzle when it touches the oil.
  4. Put the batter into the piping bag fitted with a large star nozzle. Pipe 10cm strips of batter on to the surface of hot oil and use scissors to snip them off. Fry the churros until golden brown, then drain on kitchen towel and sprinkle with caster sugar or cinnamon sugar.

I promised you, if you have a cup of hot chocolate or coffee, or even better melt the nutella a bit in microwave for the dipping then you will realized you are in the world of happiness is just there in your kitchen.

Classic Chinese Roast Pork Belly 燒肉

Roast pork belly

I never though I could do a classic Chinese dish or I called it cured pork in Chinese style. It first came to me as French lardon, however the French cured the meat as a whole including the skin. The only different the Chinese style has a very crispy skin after it roast and I have the full classic Chinese recipe. Be prepare to get a kilo of coarse salt in your kitchen, however I have some shortcut for that too, if you could wait it patiently until is ready.

  • 1 kg pork belly
  • 1 tsp five spice powder
  • ½ tsp ground white pepper
  • 1 tbsp Shao Hsing rice wine 紹興花彫酒 (you could get it from Chinese supermarket)
  • 2 tsp of salt
  • 1 tbsp Rice wine vinegar
  • 1.5 kg coarse salt (this ingredient exist if you couldn’t wait any longer than 24 hours)
  • 3 egg whites
  1. Place the meat on the chopping board with the skin-side-down.
  2. Cut the meat but the skin still intact with the meat, you are not completely cut the meat off.
  3. In a small bowl mix the spice, pepper and Shao Hsing rice wine. Rub this mixture on the the meat on the side and cut area except this skin make sure is fully coated with the mixture.
  4. In another small bowl mix the 2 tsp of the salt and the rice wine vinegar. Now, place the meat onto a flat surface tray then turn the meat skin-side-up and the brush to the skin of the pork with the mixture of salt and vinegar.
  5. Place the meat into the fridge to let it dry for at least 24 hours. (if you are omitting the kilo of salts then you must expend the drying time at least 3 days otherwise 5 days is the best)
  6. After air dry in the fridge for choice of your time, it is time to take the meat out from the fridge, and use a sharp knife to poke many holes onto the skin.
  7. If you air dry it for 3 day or 5 day you can put into the preheat oven of 210°C for 45 minutes, after you poking them. Otherwise after the air dry of 24 hours in the fridge, then you have to build the salt pit cover the meat, first by flat laying the salt the bottom of the roasting pan then place the meat on top of the salt, and build the side-wall of the salt to cover the sides of the meat. Finally cover the skin of pork with salt as well, then only put into preheat oven of 210°C for 45 minutes.
  8. If you did build the salt pit, after 45 minutes in the oven, you can take the meat out from the oven, remove the salt pit then return the meat into the oven with same temperature for 15 minutes. Otherwise increase the oven temperature to 240°C then roast for another 10 minutes. If you did not build the salt pit.

After let the meat cool, you can enjoy it with the crispy skin whenever you bite through the meat. You can keep this leftover in the fridge, to refresh it either with air fryer or simply put them into frying pan.

Paprika Chicken

    I was away from my blog for a long time, I been trying varies cooking and recipe. I’m currently down to Keto meals that going to make some different in my daily diet, to improve my health in general. This is the first keto meal I cooked, and I’m absolutely loving it, no other dietary will advise you to having fat like nobody business. It does look like Indian dish with that vividly red and creamy curry. The thickness of the sauce is the one to dive in, I even using spatula to clean the saucepan. as it was so delicious I eat it straight from the saucepan. Here is the recipe for your adventure.
  • 4 x 115g chicken breast, skin-on
  • sea salt
  • freshly ground black pepper
  • 1 tbsp olive oil
  • 118g chopped sweet onion
  • 120ml double cream
  • 2 tsp smoked paprika
  • 120g sour cream
  • 2 tbsp chopped fresh parsley
  1. Lightly season the chicken breast with salt and pepper.
  2. Heat up a large skillet over medium-high heat with the olive oil.
  3. Sear the chicken on both sides until almost cooked through, about 15 minutes in total. Remove the chicken breast to a plate to rest.
  4. In the same skillet, add the chopped onion and saute until tender, about 4 minutes.
  5. After the onion is tender, stir in the double cream and paprika and bring the liquid to a simmer.
  6. Return the chicken breasts and any accumulated juices from the plate into the skillet and simmer the chicken for 5 minutes until completely cooked.
  7. Finally stir in the sour cream and then remove the skillet from the heat, continue stir until the sour cream is fully incorporated.
  8. Serve topped with the freshly chopped parsley.

I hope you will not eating straight from the skillet.

Taro Rolls

IMG_4334ATaro wrap are one of my family recipe has been pass from generation to another, now I am inherited from my Mother, we spend Chinese New Year together, as usual she will made this for that reason of celebrate Chinese New Year.  She did insisted on her method of doing this dish.

I had a lot of fun jotting down the recipe from her, she didn’t measure the ingredients because she had used to do it frequently by eye, so she don’t need to weight it. Indeed is very rare to get a good texture taro roots, whenever she found good taro roots laying around in the market or her friend give her a home-grown taro roots, she will be delighted to make this dish for self-indulgence as snack or give to her friend for sharing.

I love the sandy texture of the taro roots when you cut it in half before you use it in the recipe. Is time to get your hands dirty with this.

Ingredients:

  • 510g Taro root, coarsely shredded
  • 400g White radish, coarsely shredded
  • 400g Yam bean, coarsely shredded
  • 140g Dried peanut
  • 1 tsp ground white pepper
  • 1 tsp sea salt
  • 1/2 tsp MSG (optional)
  • 150g Rice flour
  • 50g Tapioca starch
  • 4 sheet of bean curd (approx 30cm x 30cm)
  • Vegetable oil or flavorless oil for frying
  1. Soak the dried peanut in water for 10 minutes, then drain the water away. Use mortal & pestle to coarsely smash the peanut, set aside.
  2. Mix the shredded radish, bean, taro roots in a large bowl, then mix in the crushed peanut. Now, sprinkle the salt, pepper, MSG (if using) you could use hand or spatula to combine it. Set aside.
  3. In another bowl, mix together the rice flour and tapioca starch then use a whisk to give them a good mix.
  4. Tip the flour mixture into the mixture of shredded vegetable, the best way to mix these two main ingredients is by using your hand, so you could feel the texture, if is too runnier you could add a bit of flour.
  5. Lay the bean curd sheet on flat surface, place the mixture at the end of the sheet; then roll it away from you firmly, use sharp knife to cut off the remaining sheet. Make sure you are not double layering the bean curd sheet.
  6. Place the wrapped rolls into a bamboo steamer and steam it for 30 minutes. After 30 minutes remove it from the steamer and place them on a tray to cool, before you could cut into smaller pieces. (You can keep this roll in fridge or fridge if you planned to make it ahead)
  7. In a frying pan heat up the oil, and slowly place the cut-roll into the hot oil; fry it until golden brown, remove it from the pan then place it on the kitchen paper to catch the dripping oil.

There you are the taro rolls, I love the idea it is vegetarian friendly too. I hope you going to enjoy it too.

IMG_4306A

Chorizo-stuffed plaice with tomatoes

img_6785aI cooked this during my Christmas dinner for two with my friend, that has been a long time since we see each other, beside that to honour the dish to Elizabeth David as I picked up some inspiration from her recipe, and I give it my own twist, at the same time I celebrated her birthday as is on same day with mine on the boxing day.

She was a culinary legend that revolutionized British cookery. She had strongly influenced the art of home cooking during mid 20 century about the European cuisine and traditional British dishes.

One of the reason this special dish for the occasion of celebrate of the her writing over many year is still remain well know among chefs. However, with the growth of world celebrity chefs appealing on TV and media and author like Elizabeth David will be shadowed by them. I’m here to revive some of the authentic dishes that may has been forgotten  by younger generation.

Recipe will change over times, for me cooking is like learning a language, you will start with basic or classic recipe; and you cook along with it then you will start to adding or altering from the basic recipe, finally it gradually become yours. That is how cooking evolved with you, it became very personal, attached and memorabilia. Therefore, comfort food has became very up close and personal to every each of us. As we finding and revive the comfort in our past, childhood memory, to brought it forward into our life again. I’m presenting to you, these are the food I love and I shared with friends and family.

  • 100g pieces chorizo sausage
  • 50g breadcrumbs
  • 2 tbsp sun-dried tomatoes paste
  • 5 tbsp olive oil
  • 8 skinned fillet of 2 large plaice
  • 8 small ripe tomatoes or 4 large tomatoes, halved
  • several spring of thyme
  • splash of white wine
  • salt & pepper
  1. Cut the chorizo into pieces and blend in food processor until it is finely chopped. Add the breadcrumbs, tomato paste and 1 tablespoon of the olive oil and blend until combined.
  2. Lay the plaice fillet, skinned side up, on the work surface. Spread each with a thin layer of the chorizo mixture and roll up, starting from the thick end.
  3. Put the fish in a large, shallow, ovenproof dish and tuck the tomatoes and thyme around the fish. Drizzle with the remaining oil and the wine and season the fish lightly.
  4. Bake in the preheated oven, 200°C (400°F), Gas Mark 6, for 20 to 25 minutes or until cooked through.

Eating this… it is really transported me to Mediterranean fantasy of the seafood heavy. Wonderful!

Save

Save

Save

Gingerbread spice

thumb_img_6144_1024-aI’m thrilled to be invited to host a baking demo in a beautiful kitchen showroom of Rowenda in Kuala Lumpur on the lovely Sunday. I have an attentive audience that been working from their home, and also keen bakers too.

During this time of the year, also a time to indulgent yourself into delicious food; I felt I have got many excuses for the eating opportunity during this time of the year. This is time that warmth, contentment, welcome and friendship emanate from and are celebrated in the kitchen. I find it the most cogent expression at Christmas.

  • Holiday cake
  • Nut truffle
  • Chocolate pistachio fudge
  • Christmas mince pie

I would love to share this very special recipe of my gingerbread spice, You could use it in the mince pie dough, or any filling of pie. This is the most Christmassy spice! I could ever known for.

Get ready a sterilized jar that with lid. Mix in 2 tablespoons of ground ginger, 2 tablespoons of ground cinnamon, 1 tablespoon of allspice, 1 tablespoon of ground cloves and 1 tablespoon of nutmeg. Cover the lid up and give it a good shake. ç’est tout!

Here are the links for the recipe that I had done in the demo.

https://andrewscookery.wordpress.com/2013/11/25/holiday-cake/

https://andrewscookery.wordpress.com/2013/01/26/562/

https://andrewscookery.wordpress.com/2013/01/26/chocolate-pistachio-fudge/

Humble Mince Pie

Chicken Lentil Soup

  • Lentil Soup

You may have wondering where have I gone. I have been not very well for the past few months. I just managed to able to cook properly. So I started off with this very high protein source of food to provide some nutrition to my diet.

This tiny, flat, lens-shaped pulses that grow in pods. Originating in Southeast Asia, lentils are now grow worldwide in warm countries, and vary in colour and size. The most common lentils are green, brown and red. Some of the rarer varieties are named after the area they are grown in, such as lenticchie di Castelluccio, Puglian lentils from Alta Mura in Italy, and lentilles vertes du Puy from France.

Lentils have a high food value (they are high in protein, fibre and vitamin-B) and are considered adequate protein to replace meat. Lentils must be cooked and can be pureed and used in soups and curries or added to stews and salads. But choose your lentils accordingly: some lentils, such as the red and brown ones, will cook to a mush and are good for purées; others, like Puy lentils, will hold their shape no matter how much you cook them.

These are the type of lentils:

Red. Also called Egyptian lentils, these break down when cooked and can be used for making soups and purées. They are often used in India dishes such as dhals.

Green and brown. Largest of the lentils, they keep their shape when cooked. Good in casseroles, soups and dishes where you want texture. Green and brown vary in size and colour and aren’t always easy to differentiate from each other-treat in the same way.

Puy. Tiny, speckled grey-green lentils that are grown organically and contain more minerals than other variesties. Lentilles vertes du Puy are governed by the French appellation d’origine contrôlée (AOC) and must be from that area. The same type of lentils are grown elsewhere- these are sold simply as Puy lentils.

Castelluccio. From Umbria in Italy, these are small, brownish-green lentils. They cook quickly (about 30 minutes) and retain their shape when cooked. Often serve with game.

Tips of Preparation. Contrary to popular belief, lentils don’t need to be soaked before they are cooked; soaking may cause some varieties to break up. First, pick over lentils to remove any discoloured ones or pieces of grit, then rinse and discard any lentils that float (these may have been partially eaten by bugs).

I didn’t expecting to cook lentils soup even I have a pack of lentils in my store cupboard and I had forgotten about it. The weather of for the past few days has been drizzling rain, I don’t feeling to go anywhere and I’m hungry too. So I pick up a cookery cook from my book shelf (Linda McCartney’s Home Cooking dated back 1989) as soon as I flipped the pages the only word that caught my eye “lentils soup” that rings the bell in my mind, since I have some chicken in the fridge. So I alter her recipe to suit my mood of cooking today, I don’t want anything that too heavy to eat, and I do need some protein and other mineral too. This soup supposed to be a winter dishes and it seems like is “winter” over here.

  • 1 small onion, chopped
  • 2 tbsp vegetable oil
  • 1 clove of garlic, chopped
  • 2 stick of leeks, chopped
  • handful of lentils
  • Chicken meat cut into pieces (I used the breast part)
  • 2 bay leaf
  • 3 red chilies, remove the seed
  • salt and pepper to taste
  • 200ml chicken stock (from a packet) or water
  1. Heat the oil in a very large saucepan and gently sauté the garlic, onion, chilies. Add the chicken to seal the chicken pieces, stirring frequently, for about 4 to 5 minutes.
  2. Wash the lentils twice in cold water. Drain them well and add to the pan. Add the bay leaf, salt and pepper and stir well.
  3. Pour the chicken stock or water enough to cover all ingredient. Put the lid on and simmer the soup for about 35 minutes, or until the lentils are very soft. Add a little extra stock or water if necessary.

Lentils is very popular and is enjoyed throughout Italy. The kind eaten are the continental lentils, which keep their shape when cooked. They grow in many regions of Italy, although the best come from Abruzzo and Umbria. The lentils from Castellucio, a small hill town east of Spoleto in Umbria, are the most highly regarded. They are tiny, beige-green lentils that have sweeter yet fuller flavour than others. Unlike other pulses, lenticchie do not need to soaking unless they have been stored for too long.

There are many different ways to cook lentils, in soups or as vegetables. One soup from Abruzzo mixes boiled lentils with chestnuts. The cooked chestnuts are first sautéed in a earthenware pot in olive oil, together with all the herbs available, plus chilli to taste and some tomato sauce. The cooked lentils and their water are then added to this mixture, and the soup is served with slices of fried bread. In contrast, the lentil soup from Bologna is delicacy itself: the lentils are pureed with boiled chicken and then diluted with the chicken stock. In Campania, in a dish simply called pasta e lenticchie, 2 tablespoons of olive oil, 2 garlic cloves and few chopped tomatoes are added to the nearly cooked lentils, together with some water. When the water boils, some smallish pasta is added and the result is a delicious thick soup over which a splash of best olive oil is poured just before serving.

The recipe given here is for lenticchie in Umido, which is the way we always cooked them in my family. We ate them with Zampone – and what a meal that is. In many region lentils are eaten at midnight on New Year’s Eve, or on New Year’s Day, because there is a superstition that they bring wealth in the year to come.

Lentils have been eaten for thousands of years – although both Platina and Pisanelli, a Bolognese doctor, condemned them as unhealthy and liable to cause all sorts of diseases. However, these condemnation of pulses, and of other peasant food, might well have derived from the fact that food was categorized as either light and delicate, and therefore suited to the refined palates – like pulses – for the plebs. Such was the food snobbery of the 16th century.

Save

Save

Save

Save

Save

Save

Basil

IMG_2050AWriting this post to honour Doris Andrew, one of Andrew’s family member pass away two weeks ago. I will be missing your laughter, your accompany, your food. All these are going to lived in my memory forever. I remembered you enjoyed the pizza with the fresh basil on the topping, you said the leaf is the fragrance on top of the pizza…. I will be missing you, I love you!

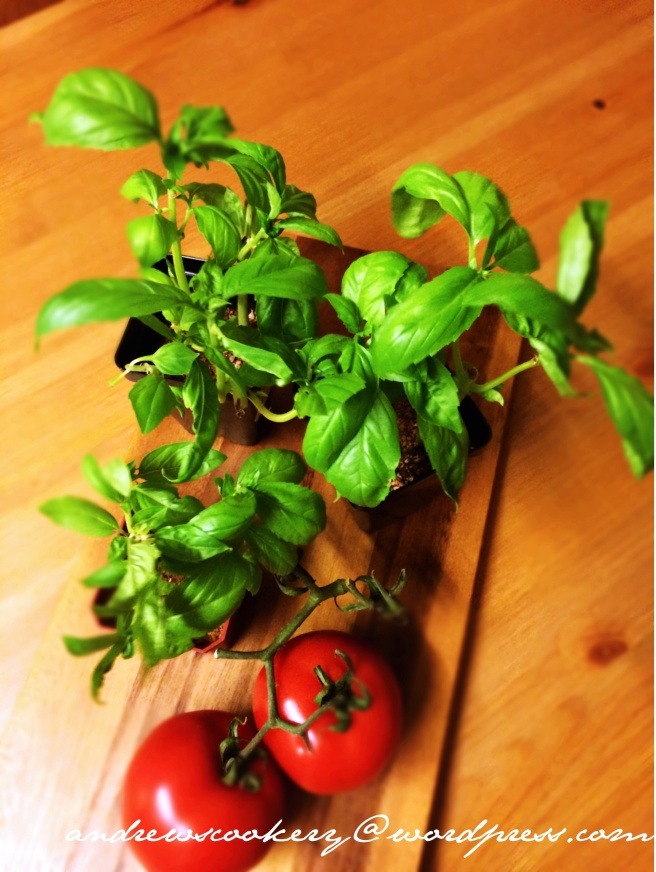
Growing your own herbs is so fun to do at home, if you have some left over herb that you brought from market. I picked those mature leaves for cooking and I remain some of it, so I can plant them in a pot for my potted herbs garden.

I love the fragrance of sweet basil leaves, the smell of the Italian cooking. This delicate herbs has a very unique story behind back to Ancient Greeks. You may have noticed I had been away for long time and I didn’t update my blog. I been reading a lot of home grown produce for the past few months. I found one of the article written by Anne Del Conte regarding basil.  There is a wonderful story of it, and recipe are superb too.

A native of India, basil was known to the ancient Greeks and the Romans and flourished wherever it could find warmth, sun and sea breezes. In Boccaccio’s Decameron, basil is the symbol of love when the noble Lisabetta, whose brothers have murdered her plebeian lover, buries the lover’s head in a pot of basil, a story that is taken up some 400 years later by Keats in his poem ‘Isabella, or the Pot of Basil’. During the Renaissance basil is mentioned by Platina, who suggested using it in moderation. It was popular all over Italy, often kept in pots on window sills as it appears in some Renaissance paintings.

For hundreds of years, basil had been used around the Italian coast in salads, with fish and in tomato sauces. In the 18th century, Corrado is the first cookery writer to mention the use of basil to dress stewed meat and to flavour vegetable soups. Artusi adds basil to his tomato sauce which, he writes, is ‘good with boiled beef and it is excellent to make very pleasant a dish of pasta dressed with butter and cheese, or a risotto’.

Basil gained a wider fame when Pesto crossed the borders of Liguria to become one of the favourite pasta sauces of the world. But that didn’t happen until well after World War II. Apart from pesto and in tomato sauces, basil also gives an extra dimension to a Minestrone or a vegetable soup and it makes a delicious salad with tomatoes and mozzarella, insalata caprese.

There are many varieties of basil, including: the Genovese, with a very strong yet sweet flavour; the Napoletano, with rather crinkly leaves and a minty aroma; the Fine Verde Compatto, with very small leaves and more delicate scent; and the Mammoth, with very big leaves, the best for drying. However, basil does not dry well and its flavour changes considerably. The best way to preserve basil is to layer the leaves with olive oil in a sterilised jar, or to freeze the leaves.

Basil sauce Pesto

This famous sauce has its origins in Liguria, when the basil is sweeter yet more aromatic than anywhere else, thanks to the perfect balance between humidity and hot sun. It is indeed odd that the only speciality from Liguria that genuinely needs a local ingredient should be the one that has travelled all over the world.

There are two fundamental types of pesto: the pesto of the western Riviera and the pesto of the eastern Riviera. The former, which includes the classic pesto genovese, is stronger and simpler, the latter is more delicate, containing less garlic, some pine nuts, grated Pecorino and or Parmesan and other ingredients which make it less fierce. But, after that, there are as many recipes as cooks, and no Ligurian cook would actually know how much of this or that goes into it: it’s all a question of judgement and personal taste. The basil is pounded in a mortar with some garlic, salt and, if added, pine nuts or walnuts, the basil local extra virgin olive oil being added drop by drop. This at least, is the old-fashioned method; nowadays it is often made in the blender or food processor. Connoisseurs say this is to the detriment of its flavour, since the basil is being chopped by a metal blade. which might also warm the mixture, rather than pounded by wooden pestle. There is a more delicate version of pesto, in which some butter or cream is added, and the garlic reduced.

Pesto is traditionally used to dress Trenette, Trofie and picagge; to a Genoese it would be inconceivable that it should be used with any other shape of pasta. The pasta is often cooked with sliced potatoes and green beans and all three ingredients are dressed with pesto and eaten together. Pesto is used also to dress potato gnocchi or to give a local touch – one spoonful is enough – to a Minestrone  all genovese.

Make for 4 pasta or gnocchi
20g/ 2 1/2 tbsp pine nuts
50g fresh basil leaves
1 garlic clove, peeled
a pinch of coarse sea salt
4 tbsp freshly grated parmesan cheese
2 tbsp freshly grated mature pecorino cheese
125ml extra virgin olive oil, preferably Ligurian

Preheat the oven to 180C/ 350F.

Spread the pine nuts on a baking sheet and place in the oven for 3-4 minutes, to release the aroma of the nuts

Put the basil, garlic, pine nuts and salt in a mortar. Grind with the pestle, crushing all the ingredients against the side of the mortar until the mixture has become a paste. You can use a food processor or blender.

Mix in the grated cheeses and pour over the oil very gradually, beating with a wooden spoon.

Doris, this recipe is dedicated for you.
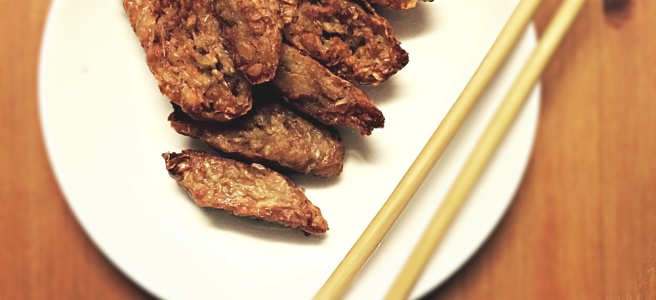
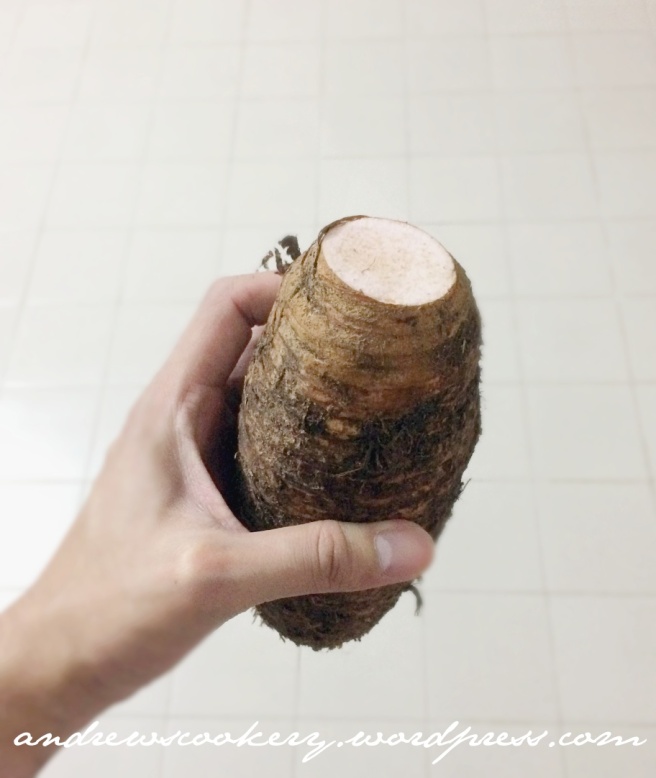
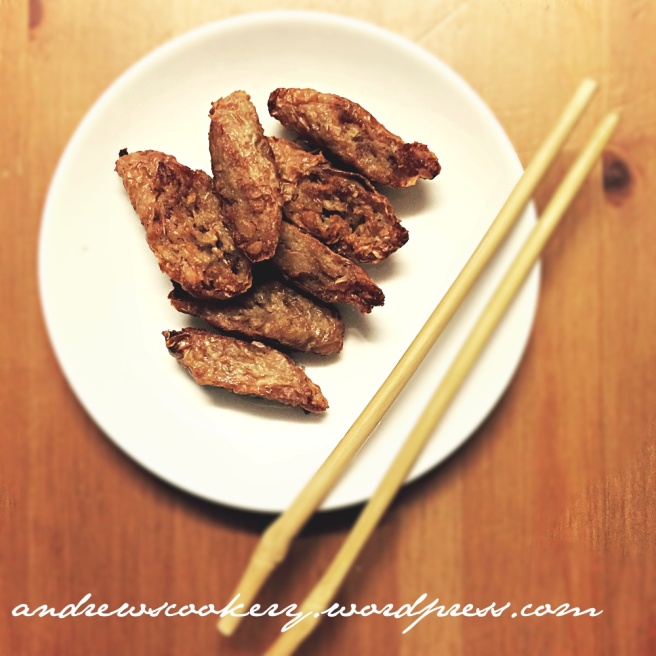