Classic Chinese Roast Pork Belly 燒肉

Roast pork belly

I never though I could do a classic Chinese dish or I called it cured pork in Chinese style. It first came to me as French lardon, however the French cured the meat as a whole including the skin. The only different the Chinese style has a very crispy skin after it roast and I have the full classic Chinese recipe. Be prepare to get a kilo of coarse salt in your kitchen, however I have some shortcut for that too, if you could wait it patiently until is ready.

  • 1 kg pork belly
  • 1 tsp five spice powder
  • ½ tsp ground white pepper
  • 1 tbsp Shao Hsing rice wine 紹興花彫酒 (you could get it from Chinese supermarket)
  • 2 tsp of salt
  • 1 tbsp Rice wine vinegar
  • 1.5 kg coarse salt (this ingredient exist if you couldn’t wait any longer than 24 hours)
  • 3 egg whites
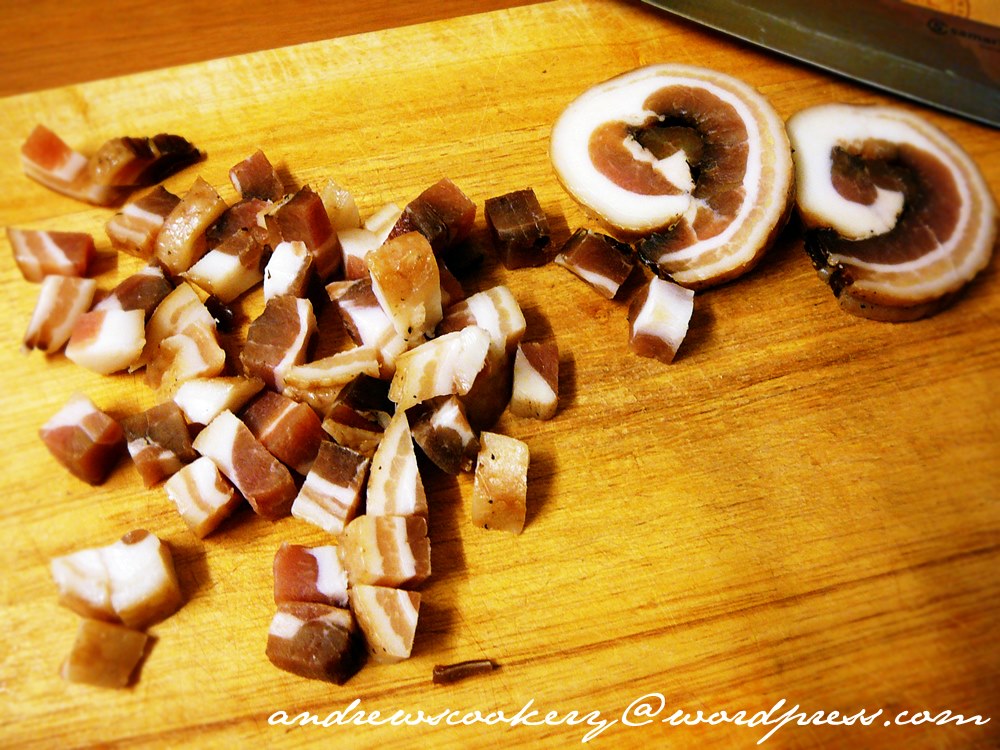
  1. Place the meat on the chopping board with the skin-side-down.
  2. Cut the meat but the skin still intact with the meat, you are not completely cut the meat off.
  3. In a small bowl mix the spice, pepper and Shao Hsing rice wine. Rub this mixture on the the meat on the side and cut area except this skin make sure is fully coated with the mixture.
  4. In another small bowl mix the 2 tsp of the salt and the rice wine vinegar. Now, place the meat onto a flat surface tray then turn the meat skin-side-up and the brush to the skin of the pork with the mixture of salt and vinegar.
  5. Place the meat into the fridge to let it dry for at least 24 hours. (if you are omitting the kilo of salts then you must expend the drying time at least 3 days otherwise 5 days is the best)
  6. After air dry in the fridge for choice of your time, it is time to take the meat out from the fridge, and use a sharp knife to poke many holes onto the skin.
  7. If you air dry it for 3 day or 5 day you can put into the preheat oven of 210°C for 45 minutes, after you poking them. Otherwise after the air dry of 24 hours in the fridge, then you have to build the salt pit cover the meat, first by flat laying the salt the bottom of the roasting pan then place the meat on top of the salt, and build the side-wall of the salt to cover the sides of the meat. Finally cover the skin of pork with salt as well, then only put into preheat oven of 210°C for 45 minutes.
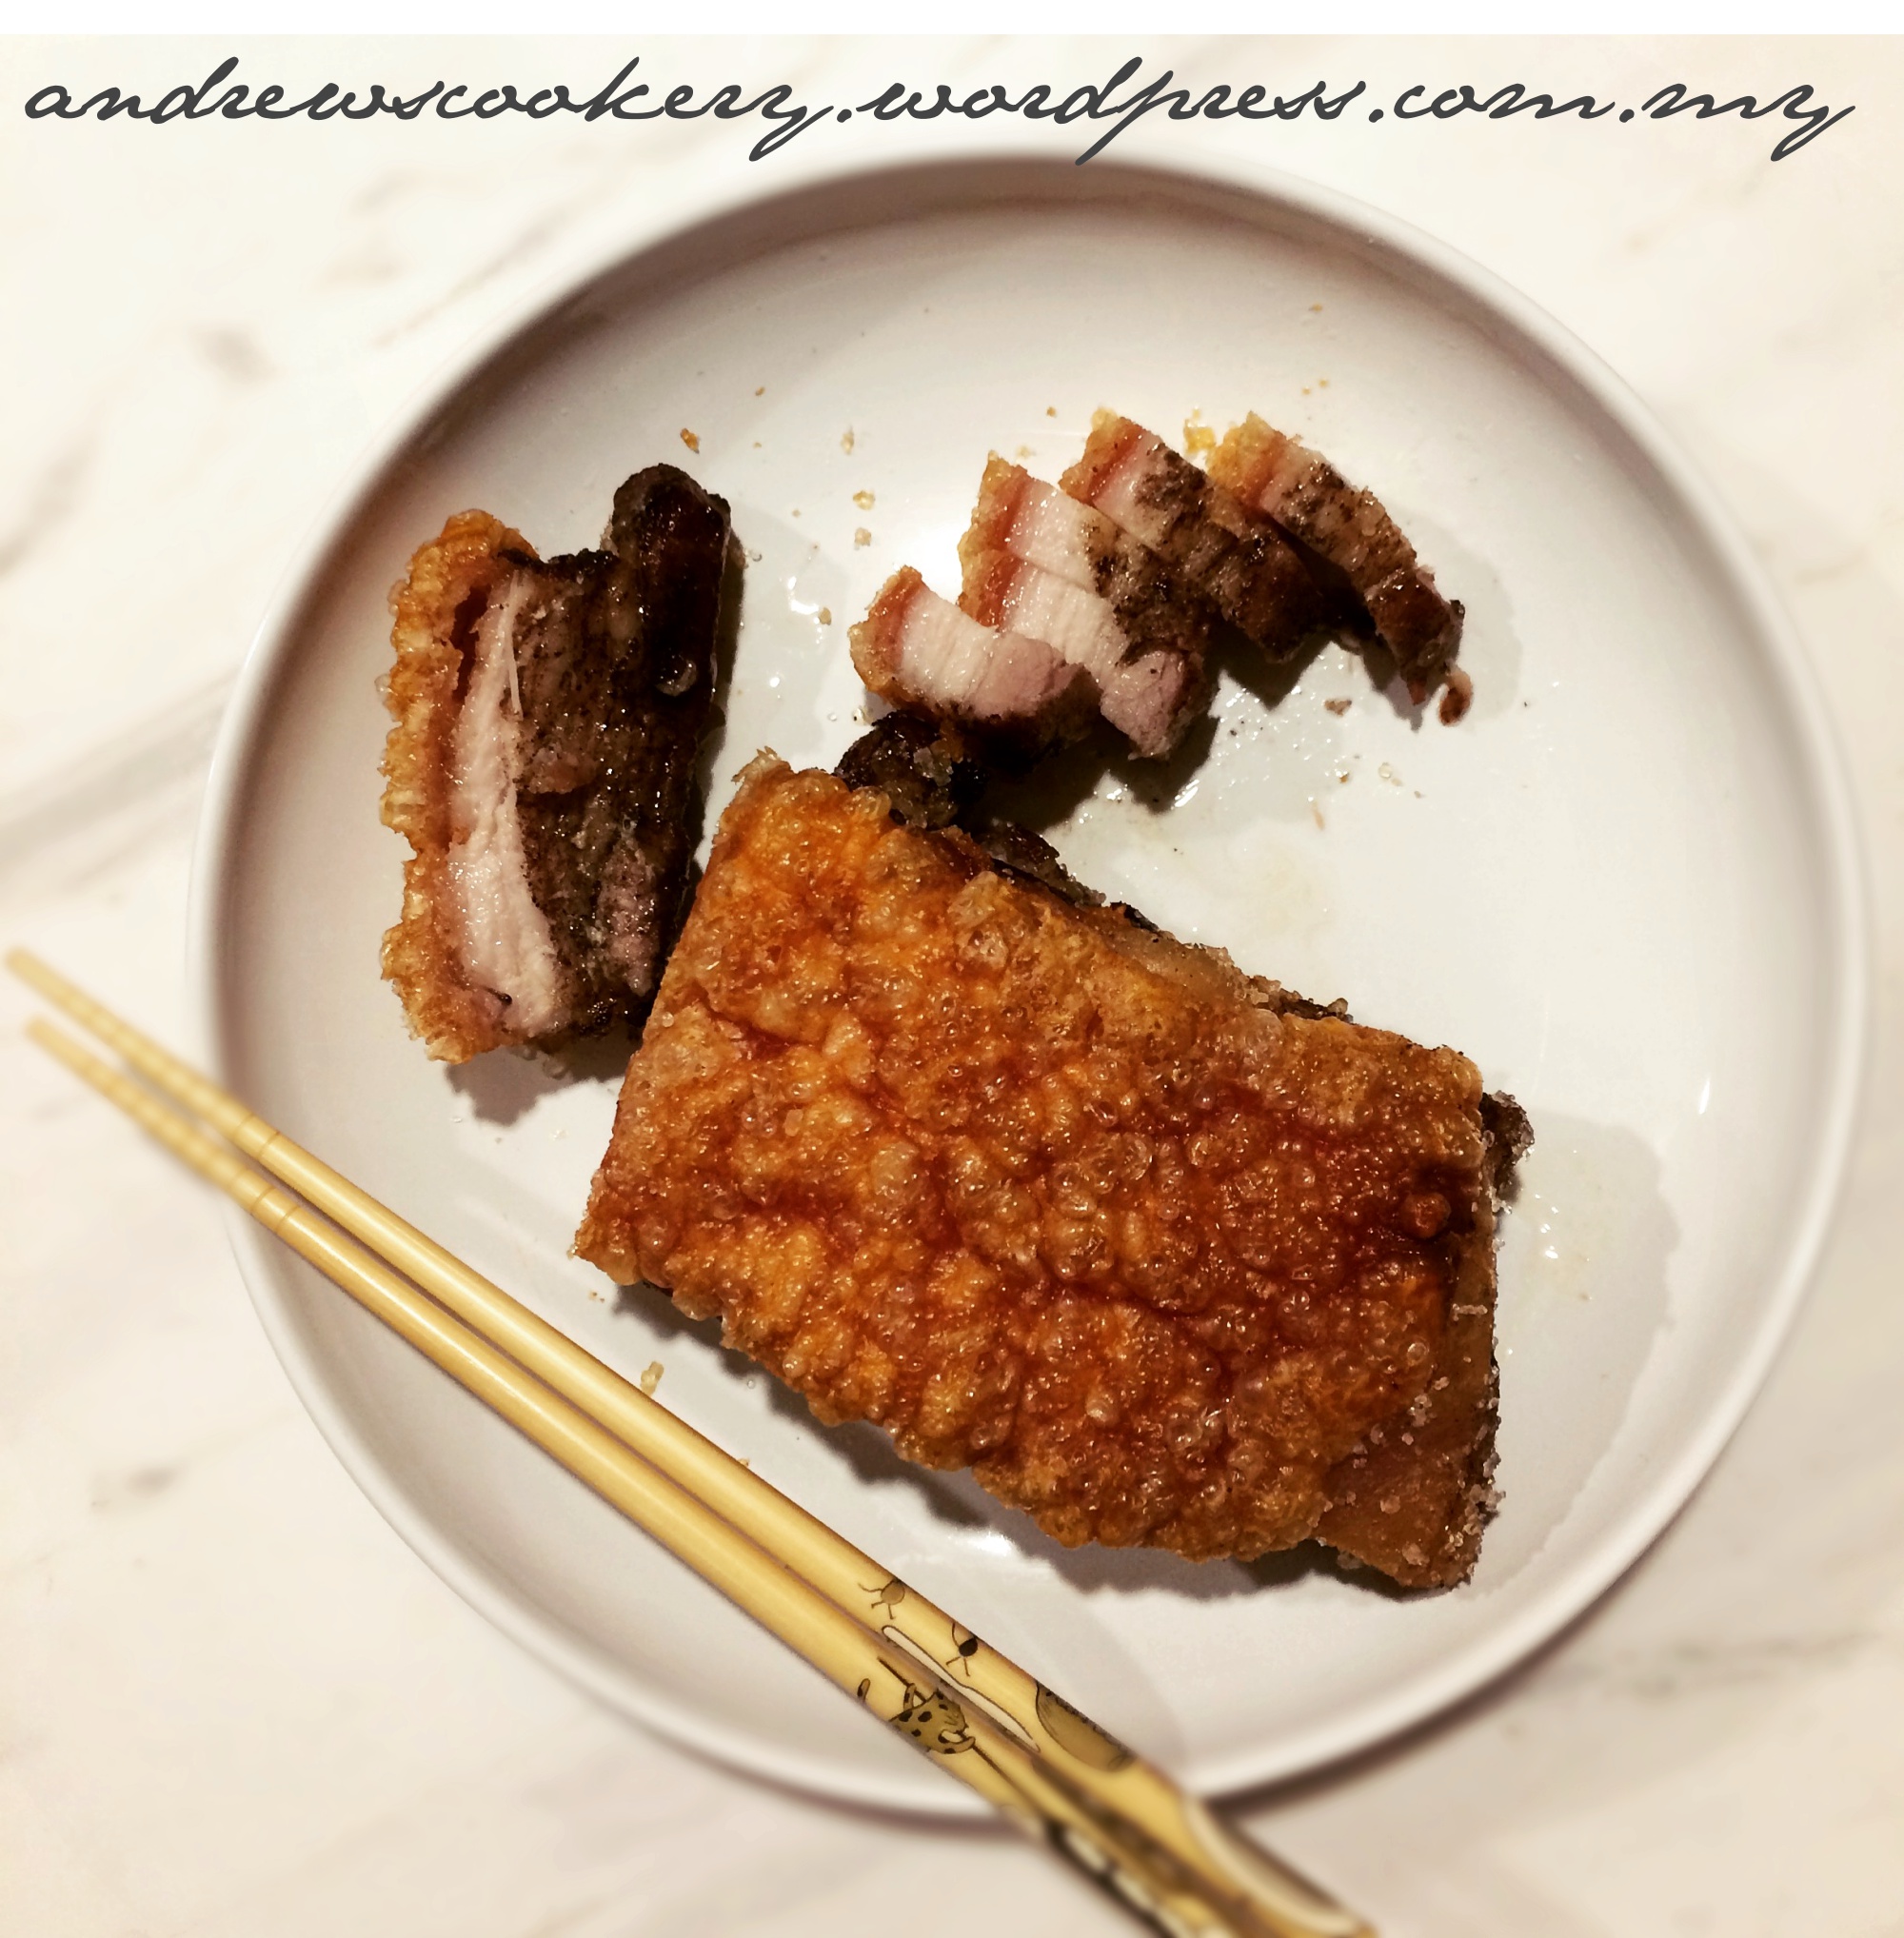
  8. If you did build the salt pit, after 45 minutes in the oven, you can take the meat out from the oven, remove the salt pit then return the meat into the oven with same temperature for 15 minutes. Otherwise increase the oven temperature to 240°C then roast for another 10 minutes. If you did not build the salt pit.

After let the meat cool, you can enjoy it with the crispy skin whenever you bite through the meat. You can keep this leftover in the fridge, to refresh it either with air fryer or simply put them into frying pan.

Home made pancetta tasting

P1170045AIt has been week after week I waiting for this cured meat to be tasted, it is firm to touch as it feels solid, the colour of the red meat had became dark maroon. I believed it soaked up all the red wine and it smell absolutely great.

Finally, I going to pan fry it for tasting, I don’t know how to slice it thinly like the butcher did, and I don’t have a good curving skill either, so cut it into cubes will do. Cured meat content higher salt as it is part of the curing process, alcohol added is to give it a flavour and cure. You could reduce the salt but it is a risk. I cooked it in non stick pan, once the meat hit the pan the fat will release when frying, no extra oil is needed. Pan fry it until golden brown and remove the pancetta onto a plate that lined with kitchen towel to absorb the exceed grease from the meat. Then I tip a bit of frozen pea into fat until is soft. It does made a different with bits of green over the meat. Do remember no extra salt needed for this as meat was cured with salt. I maybe shouldn’t say this, I the first pancetta hit in my mouth I bites the pancetta with fat, it burst! The meat is very tender and succulent, juicy as well because of the fat. I been mentioned the word “fat”, indeed pancetta need fat to protect the meat while curing process begun. It sort of seal the meat after the herbs, salt, alcohol was absorb into the meat, that is where is fat and skin come in useful to seal the meal and starting the curing process.

Most people are terrified when I told them I curing my own meat, and the first thing in their mind, curing is butchers specialty, how could a household could do it? And being a raw to deal with and a lot of risk if didn’t done it correctly. It is always got alternative to do something, not necessary to follow the butchers’ way, think of the shortcut and whichever tool or equipment you got there.

The reason I cured my own meat, is it being too expensive to buy it from the local butcher as he charged me MYR70 (£13) for three slices that is less than 100 grams, that is how I do it myself instead. Well, it won’t be very Italian pancetta, I know this is going to be a good one, indeed it is. If you like to the same here is the delicious recipe.

Cured meat – Pancetta

Although it took longer time to cured than cooking it, it is worth to have a go for it, you may fall in love cure the meat in your household. Hope you going enjoy it!

Dory fish with celery, peas & beurre blanc

P1150004A

I should really tell you the meal I had this evening is very much pleasing with the beurre blanc sauce over the fish. Albert Jack’s book said the beurre blanc sauce was discovered after a mistake from a chef. Here is the story.

“One of famous sauce, beurre blanc (white butter) apparently evolved from a mistake made by French chef Madame Clémence Lefeuvre towards the end of the nineteenth century while she was working in the kitchens of the marquis de Goulaine. On one occasion, the story goes, intending to make Béarnaise sauce for a pike dish, Lefeuvre ran out of eggs at the crucial moment and had to quickly improvise, using wine and lemon juice instead. Legend has it that her new sauce became so popular she opened her own restaurant, La Bubette de la Marine, on the banks of the Loire River near Nantes, on the strength of it with beurre blanc as her signature sauce”.

Here is my recipe for you to try it at home. It’s important that you have all of the ingredients for the sauce ready prepared before you start to cook the fish, or the fish will become dry and cold while you’re making the sauce.

Marinate for the fish

Vegetable side

  • 2 stalks of celery
  • 50g sweet peas
  • pinch of salt

Beurre Blanc Sauce

  • 1 shallot, finely chopped
  • 6 tablespoons of dry white wine
  • 4 tablespoons white wine vinegar
  • 4 tablespoons double cream
  • 100g butter, cubed
  • pinch of salt
  • pinch of cayenne pepper
  • Herb of your choice: mint, parsley, basil or tarragon
  1. Marinate the fish by putting all marinate ingredient into freezer bag and put the fish into the bag and give it a mix with the fish and set aside so that the flavours can infuse the fish. The fish can marinate in the bag for 1 hour in the fridge, or less if you’re in a hurry.
  2. Cut celery into bite size then set aside. Bring a pot of water to boil then add pinch of salt into boiling water, reduce the heat to medium and then add in the celery and let it boil for about 3 minutes and add in the pea to finish up to 5 minutes. After that drain it off, put on a lid and set aside somewhere warm.
  3. Heat up a frying pan to medium heat, place the marinated fish in the heated pan and pan fry until golden colour at the edge and is not pale in colour. Put the cooked fish on a warmed serving plate with the vegetable, and set aside somewhere warm.
  4. Simmer the shallot, wine and vinegar in a pan until reduced to 1 tablespoon, remove the pan from the heat and whisk in the cream followed by 1 cube of the butter at a time. Make sure to whisk energetically. If the butter isn’t melting, put the pan back on a very low heat. Once all the butter is incorporated, season with salt and little cayenne. Serve immediately by spoon it over the cooked fish. Chopped herbs, such as mint, parsely, basil or tarragon, make a nice addition.

Beurre blanc should taste creamy, frothy, light and tangy. This simple yet classic French sauce is probably the quickest way to add extra flavour to fish, meat, poultry and vegetable. It’s quite quick to make, apart from melting a little butter. Remember, this is for one portion, if you have a guest, you’ll need to double the ingredients., Bon appetit.